What Is Best Way to Manage Reviews Online
The procedure of organizing pictures is a fourth dimension-consuming, but crucial task. Keeping your images organized and backed up will save you lot a lot of time and headache in the futurity. Therefore, it is essential that yous do information technology properly early on and go along a consequent system in place. Photographs are our precious memories frozen in time, and nosotros simply cannot afford to lose them. In this commodity, I will provide detailed information on how you tin organize your digital photographs on your reckoner and implement unproblematic backup practices.
Whether you have pictures with your smartphone or a dedicated camera, you accept most likely accumulated thousands of images over the years. Those images are probably scattered all over the place – some on your phone, others on your reckoner. And if yous previously ran out of storage, you might accept dumped some onto an external drive too.
Merely what if y'all were able to put them all in a single location, properly organize them in an easy to recall manner, then shop them in a safety and reliable location? It sounds like a hard job, but it is extremely simple and effective, as you will see below.
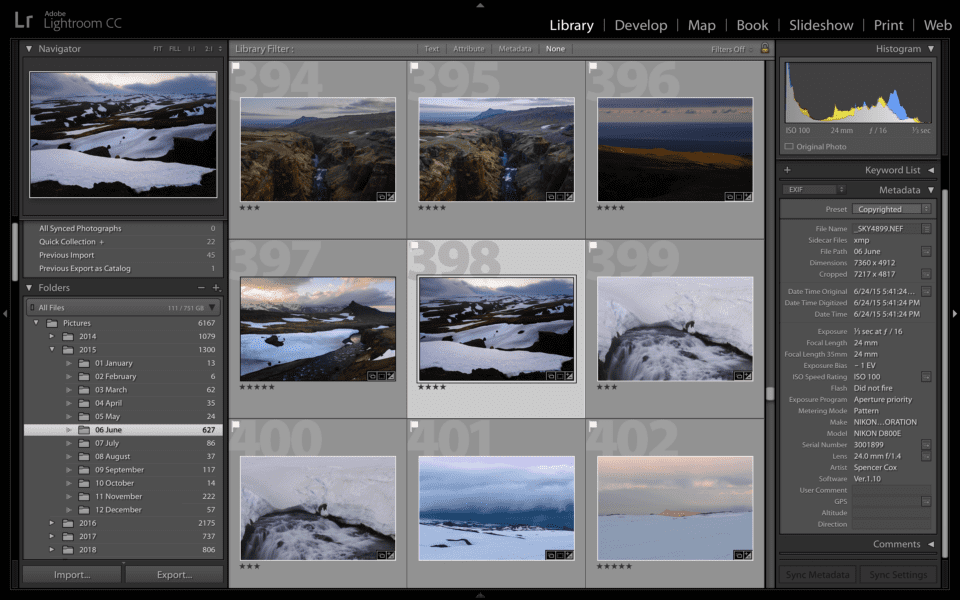
Please note that this is Non a guide for serious photographers with large epitome catalogs. If y'all are a photographer looking for ways to organize your photo library, please see my article on "organizing pictures in Lightroom" instead.
Before we become through a detailed, step-by-step process of organizing your photos, below is a quick "TLDR" version.
The Best Way to Organize Photos
- Discover All Printed Photos. If you have printed images, notice every single one that you want to preserve and digitize. Go through all prints and family albums. Because reaching out to other family members to locate more photographs.
- Digitize Printed Photos. In one case you lot locate all the photos, use a good-quality scanner to scan the photos in high resolution.
- Locate Digital Photos. Get through every device, starting from your smartphone all the way to external drives to locate every digital photo you lot have.
- Use a Single Storage Device. No matter how many photos yous have, it is all-time that you put them all in a single storage device. If your current storage device has bereft storage, purchase an external hard drive with enough capacity to fir your entire photo library.
- Use a Solid Folder Structure. In one case you put all the photos in a unmarried location, come up up with an easy-to-remember binder construction that you can apply consistently for all your photos today and in the time to come. I recommend splitting your photos into folders organized by year and event name.
- Organize All Photos. After y'all decide on the folder structure, get through all the images that yous previously scanned, equally well as your digital photos, then organize them. This is going to be the most time-consuming process.
- Backup Your Photos. Now that y'all have all the photos properly organized by folders, information technology is fourth dimension to back them upwards. Use several local storage locations to back up your photos. Also, consider using online cloud storage to store another backup.
At present that nosotros went through the quick summary, you might want to read the full version of the commodity beneath.
Table of Contents
one) Locate All of Your Photographs
Offset with your figurer and endeavor to locate every single film. Common places to look for photographs are in your "My Documents" or "My Pictures" folders, simply you might have pictures in other folders besides. Just search your computer for all files with "JPG" extension and see what it finds. Create a local binder on your desktop and motility all your pictures there. If you accept other computers/laptops at home, perform the same search and try to find every single picture. Next, go through your mobile devices (iPhone, iPod, Zune, etc) and run into if you lot have any pictures stored there too. Re-create them all to your main PC, into the same binder that y'all created earlier.
Now it is fourth dimension to look for your pictures on the Internet. Log into your email business relationship and search for all emails with image attachments. Extract whatever you tin can find and relieve them to the same location. Next, get to all social media sites that you participate in (Facebook, My Space, Twitter, etc) and look for other pictures there. Yous might find your pictures in your friends' albums too. Asking your friends to ship the high-resolution versions of the photos to yous. Effort to remember if any of your friends took your photos on their cameras and if they did, requite them a call or email them and request them to send the high-resolution versions of your photographs. Save all new photos to the same temporary folder that yous created on your desktop.
two) Storage and Fill-in
Before thinking about how to organize your images, think about where y'all will be storing your images and how you volition exist backing them up.
2.1) Where to Shop Your Photos
Some people similar to shop pictures on external drives and other storage media, merely I store all of my photographs in my reckoner's second internal drive (the outset one is for the operating system). Internal hard drives are very inexpensive nowadays and y'all can buy a very large drive of 1 Terabytes or more for less than $100. If you have a laptop, it is probably improve to store your pictures on an external drive instead, because the internal drives on laptops are typically small and slow. If you have a small-scale number of pictures (less than 1,000), y'all can hands store them on your computer's principal bulldoze. On the other hand, if you have a large collection of photos, and so I would recommend to put them on a separate hard drive.
2.ii) Where to Backup Your Photos
No matter where you shop your pictures, the start thing you need to think nigh is how you lot will be backing upwardly your images. NEVER fully rely on a unmarried storage space, whether a hard drive, a CD/DVD or a memory stick. All electronic equipment fails at some point of time and leaving your precious information in one place is like putting all of your eggs in 1 handbasket. So, no thing where you decide to store your pictures, decide where you lot will be backing them up at the same time. Do NOT make the mistake of backing up your data into the same medium. The backup must exist on a unlike concrete device, otherwise, it is not a real fill-in.
For backup purposes, I use a dedicated external drive that has exactly the same binder structure as my internal drive – it is basically a "Mirror" of my internal drive.
3) Create Main Binder Structure
Now that y'all know where to store your images and backups, information technology is time to think about your folder construction strategy, i.e. how yous will exist storing your pictures. In that location are many means to do this and everyone can give different suggestions. Let me prove you lot the way I exercise it and I will leave it up to yous to decide if it works for you lot or not. I first kickoff with the root folder and create a folder called "Pictures":
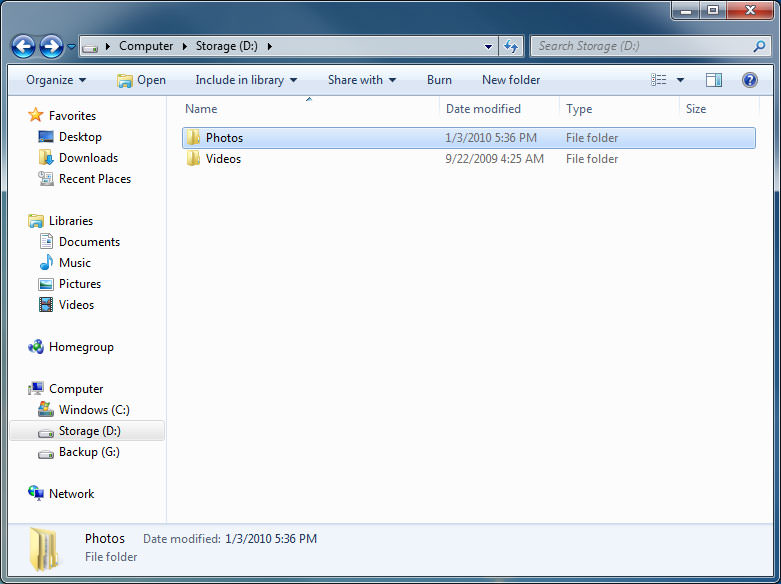
Every bit you lot can see, I have another folder for "Videos" as well :)
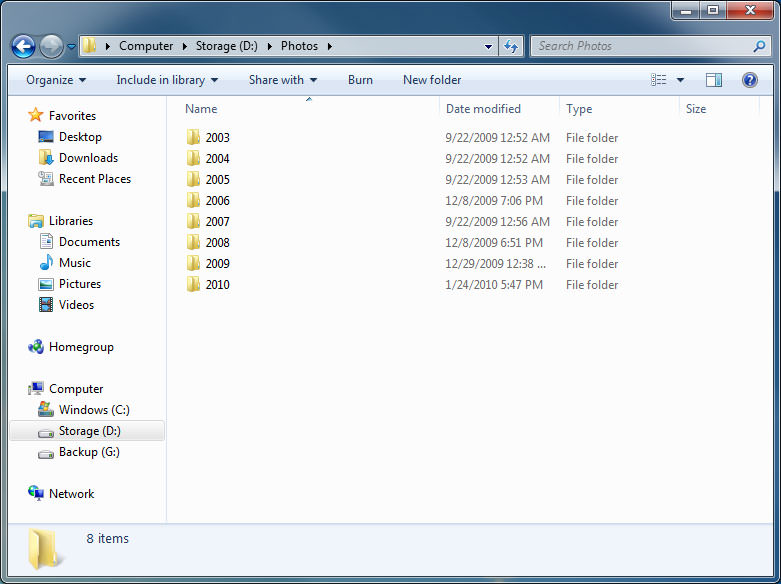
Side by side, I create folders for each year, i by 1:
four) Create 1 Folder Per Event and Move Photos
So under each folder, I create one folder per event:
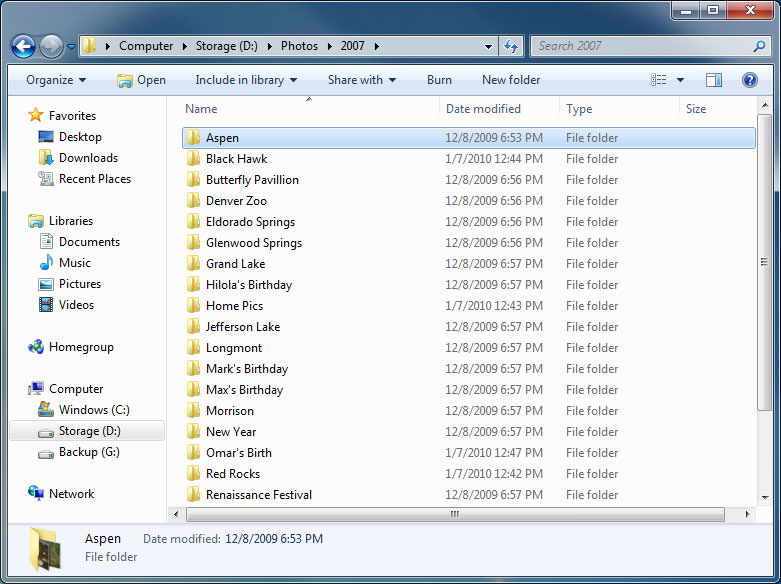
Examples of events are: "Mom's Birthday Party", "Christmas Celebration", etc. – whatever fits the description of an effect. If you have one large event that has smaller sub-events, so create i main folder and smaller subfolders underneath. For example, if you have something like "California Vacation", information technology could accept several subfolders inside such as "Disneyland", "Universal Studios", etc. Go ahead and create events for 1 yr based on what y'all accept.
I used to store each folder name by "Date Outcome", such as "01-01-2007 Aspen", but I chose to abandon this thought because I now utilize dates on my pictures instead:
Now upload your photos into appropriate folders. This is the hard part, because you will have to become through all of your photos ane by one and sort them through. Only looking at the picture show by itself is not easy, as you might not recollect when it was taken and where. What I suggest, is looking at the information that is stored inside the flick. Almost every digital camera today stores vital information such as Camera Type, Date and Time right into the picture when it saves it. This information is called "EXIF" and you can read my article "What is EXIF" to find out more most EXIF and how you tin read this data from each motion-picture show. Anyway, on most mod operating systems such every bit Windows Vista or Windows 7, yous can easily access this information past simply correct-clicking the image, clicking "Properties", then clicking on the "Details" tab:

Wait at the "Origin->Date" field for the date when the picture was taken. Other information such every bit "Camera" might exist useful to determine who took the picture (whether it was your camera or somebody else'southward). Movement all of your photos into appropriate event folders and make sure that zip is left in your original temporary folder that you created in your desktop.
five) Rename Your Photographs
Unfortunately, many cameras produce images with weird filenames like "DSC1005.JPG" that exercise non make any sense. I highly recommend to rename all of your images to brand it easier for you to locate them past searching for the file names in the time to come. Once again, you can do this in many different means, but I will show you the easiest method.
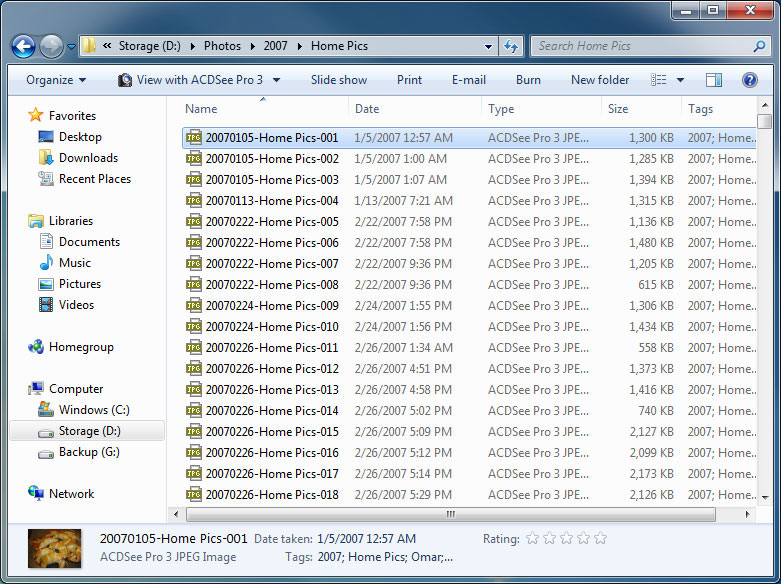
Go to i of the folders that contains your pictures. It is a expert idea to start with a small binder, so pick one with only a few pictures. First, sort all your images by date by clicking the "Appointment" column (you should be in a "Detail" view for this to work). Then select all pictures by clicking on the first one and so pressing CTRL+A (select all):
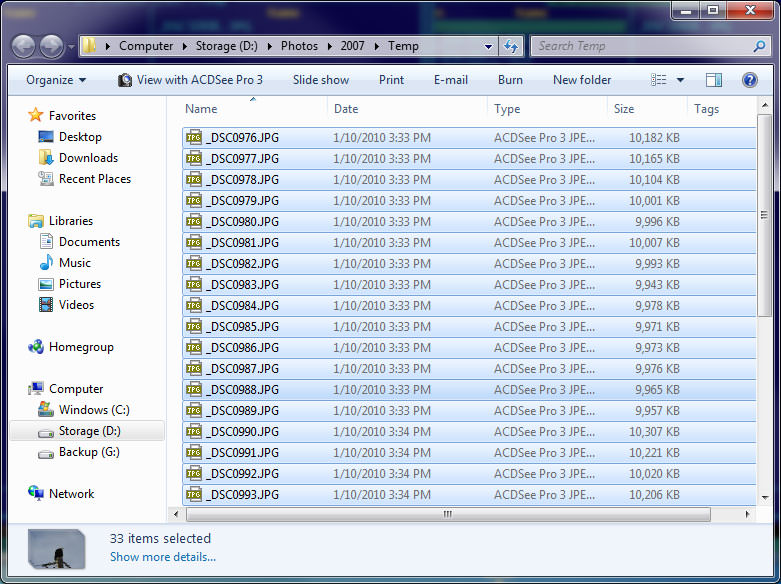
Then correct-click on the first image and click "Rename":

Then blazon the date, nuance, event proper name and press "Enter" (for example: "20070101-Local Park"). I prefer to use the year first, and so month, then solar day; because if your files are somehow mixed up in i folder, it will be easier to differentiate them by yr, so calendar month so day. If you starting time with a month, information technology will all get mixed upwardly, because the months are repeated every year:
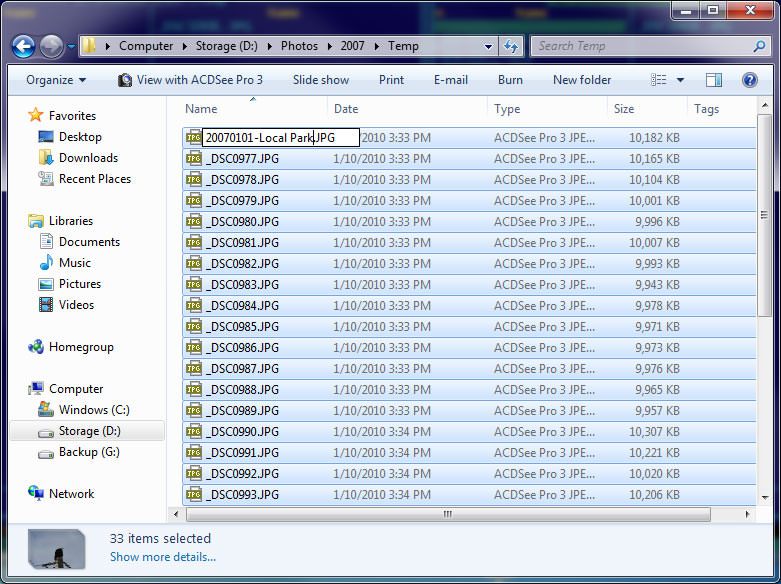
Y'all should at present see that all your files got properly renamed. The system volition automatically add a number in brackets at the end of the file, which represents the file sequence number:

Do non worry if something got messed up. Yous can go back to what it was by simply by going to "Edit"->"Undo Rename" or hit "CTRL+Z". Yous tin can besides rename the files multiple times, if needed. Repeat this process as many times equally yous have folders and make sure that everything is properly renamed.
6) Backup Your Photos
Now that you have everything organized and renamed, it is now time to back up your data. Since you are just storing blank files, there is no demand for some special fill-in programme. All you need to do is to copy your files from the current location to a different one. Just go back to your main folder, select your "Photos" folder, right click on information technology, select "Copy", then go to your destination drive's primary folder, right click on an empty area and select "Paste". This should start the process of copying pictures from one hard drive to another.
6.1) Fill-in Frequency
How often should you be backing up? I suggest backing up every time yous add more than photographs or when you lot piece of work on your pictures. I personally endeavor to exercise it every time I upload new photos from my camera and I highly recommend that you exercise the same. Unfortunately, most people do not recognize the value of backups until their equipment fails. I once lost two weeks of my photography merely considering I forgot to fill-in my photos! Lesson learned, now I try to fill-in as often every bit I tin and I store my images in four different locations – I practise not desire to ever lose my data again.
Hope this helps.
martinezhazies1988.blogspot.com
Source: https://photographylife.com/how-to-organize-pictures
0 Response to "What Is Best Way to Manage Reviews Online"
إرسال تعليق